May 30, 2011

.muffins...kind of.

So awhile back I saw over on tj's test kitchen that she made so really interesting looking meatballs. Then, after more reading, I realized they were actually meatloaf muffins. Part of that sounds really disgusting but I think being pregnant makes anything sound delicious. So I decided to make some. We had them tonight with some more roasted squash. These were probably the best tasting meatloaf type of meal I've ever made. I kind of followed my own meatloaf recipe but you can add whatever you want. TJ put a bell pepper, carrots and zucchini in hers, which also sounds awesome. I just didn't have any of those ready at the moment.


Turkey Meatloaf Muffins makes 12
1 pound lean ground turkey (could also use beef if you prefer it)
1/2 medium onion, diced
2 eggs
1 sleeve of saltine crackers, crushed
2 tablespoons garlic salt
Salt and pepper to taste

Preheat oven to 375 degrees. Spray each well of a muffin pan with cooking spray.

Place all ingredients in a large bowl and mix together until combined. Using a spoon place an equal amount of mixture into each muffin well. Bake for roughly 45 minutes or until cooked through.

I enjoyed mine with some ketchup, while the man just ate them by themselves. Very tasty stuff! I think the turkey really adds something to this as well. I've only ever made meatloaf with beef but this came out much more flavorful and way less greasy. Definitely a plus! These would be a great way to sneak veggies into dinner for kids.

XO

May 23, 2011

.exciting news.

Let me start out by saying Hello! To all the readers who popped over here from *Bitch Cakes*! Glad to see you guys. And for those of you who don't know, I just won a giveaway that Sheryl was doing for an incredible heart rate monitor! Very exciting stuff. I can't wait to start using it! It will be awesome for the next few months before the baby comes, and then once she's here and I get the go ahead to work out it will definitely help me keep track of getting my butt in gear!

Now, on to the really good stuff: What I ate for dinner. Okay, maybe I just think that's the good stuff. Ha. Regardless, I made a most delicious meal tonight. I think it's pretty funny that I have apparently got my kitchen legs back while the man is gone. He is missing out!! Sorry babe.


Tonight I made marinated grilled tofu with roasted vegetables and green beans. So good. As far as the marinade goes, it's really a personal taste sort of thing. I never measure when I put a marinade together, and as a result I don't think I ever make the same once twice. For my Asian inspired marinades I use the normal cast of characters.


Then I just kind of add a little of this, a little of that, until it tastes like it would be delicious covering a piece of tofu, chicken, steak, whatever. And yes, for those of you who don't like tofu this marinade would go awesome on pretty much any other type of protein. If you have never tried tofu though, try it first! In fact, try it multiple times before deciding you don't like it. I got some really nasty tasting tofu once in a restaurant and if I had based my entire opinion on that one piece.... well, me and tofu would not be pals.

I let the tofu marinate for a little over an hour, then simply put it on the grill pan. I let each side cook for roughly 4 minutes, or until there are grill marks. If you were cooking meat though you would want to make sure it cooked all the way through.

While the tofu was marinating I started on the veggies. Baby potatoes and carrots... and I threw in the last few mushrooms I had as well, because they were lonely and wanted to join the party. Can you blame them? After scrubbing and chopping the veggies into bite sized pieces I tossed them with some olive oil, salt and pepper, and garlic then placed them on a baking sheet and into a 400 degree oven for about 45 minutes. I timed it so these would be coming out right as the tofu was getting done.


And then after dinner I of course ate more blondies. Ha. Luckily I had some visitors yesterday that ate more than half the pan for me, which I greatly appreciated! Now, with the man not here, I get to go do really exciting things like watch ridiculous chick flicks from Netflix. 5 points if you can guess the movie! I'm telling you, it's ridiculous and a little bit embarrassing. Ha.

XO

May 21, 2011

.the baby wanted this.

Last night I felt pretty good about my self control. Ms. Smart tweeted something about sort of of blondie concoction and all I could think of the whole night was I must bake blondies. But I didn't. Because I have self control.

Well.... had self control. Last night. Tonight, however, was a completely different story. The baby wanted some blondies, and man did she get them. I found a simple recipe on foodnetwork.com, swapped a few things out and had some completely delicious blondies ready to go for after dinner.

Said delicious blondies

Blondies makes 12 squares
3/4 cup packed brown sugar
1 large egg
2 teaspoons vanilla extract
8 tablespoons (yes, 1 whole stick) unsalted butter, melted
1 1/2 cups flour
1/2 teaspoon baking soda
Pinch of salt
1/2 cup dark chocolate chips (or more!)

Preheat oven to 325 degrees. Spray an 8 inch by 8 inch pan with cooking spray.

In a mixer, or with a hand held mixer, beat the brown sugar and egg together until fluffy. Add the vanilla and melted butter, mix well. Add the flour, baking soda and salt, mix until just incorporated. Using a spatula gently mix in the chocolate chips. Place into the pan and spread evenly with the spatula. The dough will be fairly dense.

Bake for 20-25 minutes. Or until an inserted toothpick comes out clean.

There are tons of other things you could add to these, which I am already thinking about for next time. I felt pretty good about them though. They were my first blondies! In the future though I may add nuts, different chocolate chips, maybe even heath bar chips. They would also be pretty good served warm with some ice cream. As it is, they were delicious with a tall glass of milk and some strawberries (that are SO ripe, yum!). And really, strawberries are healthy for you. So they kind of balanced out the blondies. Right? Which pretty much means I could go eat another blondie if I wanted to. That's how these things work, isn't it???

XO

May 20, 2011

.probably one of my favorite foods.

I love stuffed mushrooms. Love them. When they're done well. This is interesting to me because up until I was about 21 I HATED them. With a fiery passion. If anything had mushroom at all in it, I hated it. Over the last few years though the little fungi have grown on me.

For dinner tonight I combined two of my favorite things, stuffed mushrooms and goat cheese. And yes it is as fabulous as it sounds. I kept everything else pretty simple. I think next time I will add a little something to the cheese mixture. Bacon, chopped nuts, and/or breadcrumbs were all on my list of ideas. I also baked some more squash to go with the mushrooms, but this time without any breading. I just added a small dollop of the stuffing I used for the mushrooms (as I had a bit leftover). Both the mushrooms and the squash were delicious, and fairly filling, but I will say they are probably not best together as a dinner. I had to eat some peanut butter and crackers 30 minutes later for some protein! I think both or either would be great with a pork chop.

Goat Cheese Stuffed Mushrooms serves 1-2
8 baby bella mushrooms
3 ounces goat cheese
1 clove of garlic
2 teaspoons olive oil
salt

Preheat the oven to 350 degrees.

With a damp rag or paper towel, gently wipe the dirt off the mushrooms. Take the stems out. Finely chop about half of the stems, place in a bowl. Mince the garlic, add to the bowl. Add the goat cheese and olive oil. Combine the ingredients in the bowl. Spoon a small amount of cheese mixture into the cavity of each mushroom cap. Sprinkle with salt.

Spray a baking sheet with cooking spray, place the mushrooms on the sheet, spray the tops of the mushrooms with the cooking spray. Cook for 20-25 minutes.

So good! My pictures didn't turn out great but I am super excited about something. Did you notice?! A new plate! Yes, I get excited over things like that. Haha.

XO

May 19, 2011

.daring cooks challenge: may.

Our May hostess, Denise, of There’s a Newf in My Soup!, challenged The Daring Cooks to make Gumbo! She provided us with all the recipes we’d need, from creole spices, homemade stock, and Louisiana white rice, to Drew’s Chicken & Smoked Sausage Gumbo and Seafood Gumbo from My New Orleans: The Cookbook, by John Besh.


Now, as delicious as I'm sure those recipes are there is no possible way they could compare with my family's recipe. So, that is what I will be sharing with y'all. It's really not that different from many gumbo recipes. You have a roux, you have some protein, some okra, a few various other ingredients. What makes it stand apart, and what is it's real secret ingredient, is time. No, not thyme, really, time. Lots and lots of time. This is very much a Sunday kind of meal. Or an unemployed housewife all by herself for 3 weeks while her husband is at a training class kind of meal. Yeah. I'm making a huge pot of gumbo all for myself. It's probably best though as this was my first attempt at cooking it! I usually leave it to the pros, my step-mother or Grammy.

There's a chicken in there, I swear
If making a seafood gumbo this would be a one day sort of process since you would add the seafood (shrimp, crab, etc) towards the end of the cooking time (unless you wanted to make your own stock, then give it two days), but I decided I wanted to make chicken gumbo, which is more of a two day thing. On the first day I boiled a whole chicken. Bones, skin, everything. Just boil it in seasoned water. As for the seasoning I used salt and Tony Chachere's Creole Seasoning (y'all know I love that stuff!). After the chicken is fall off the bone tender I took it off the heat, let it cool quite a bit, then took all the meat off the bones. This was probably the worst part cause, well... it was icky. Next time I may go the wuss route and just use some chicken breasts instead of the whole thing. I placed the meat in a covered bowl in the fridge and then I placed the liquid from cooking in another bowl, also in the fridge.

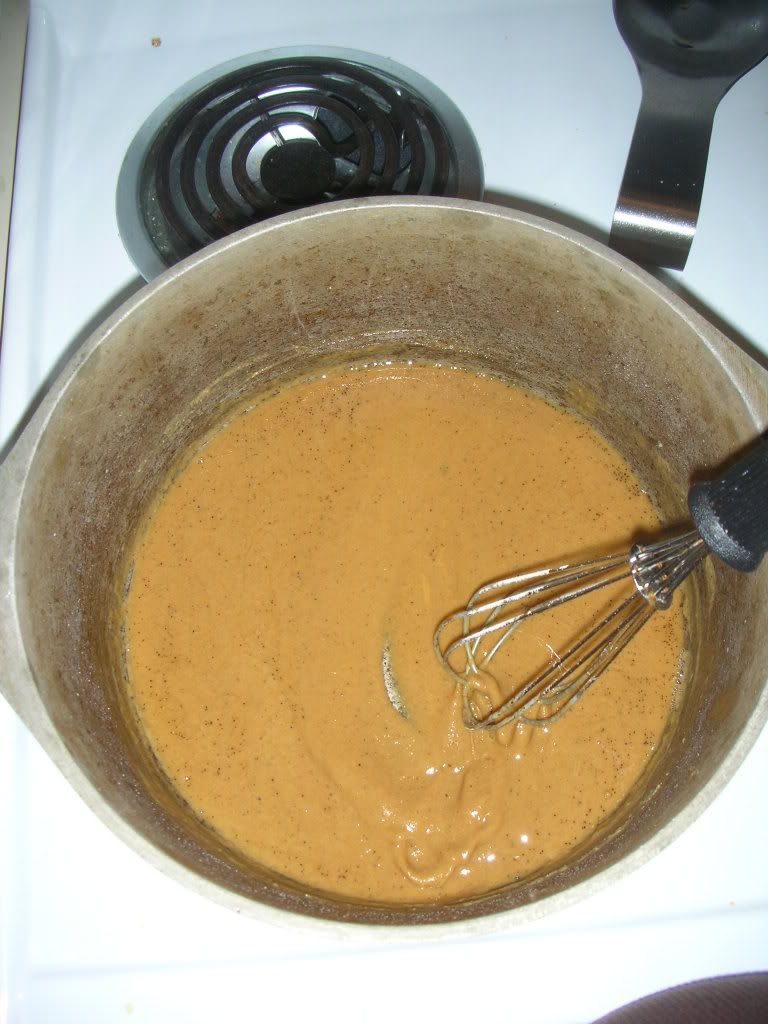
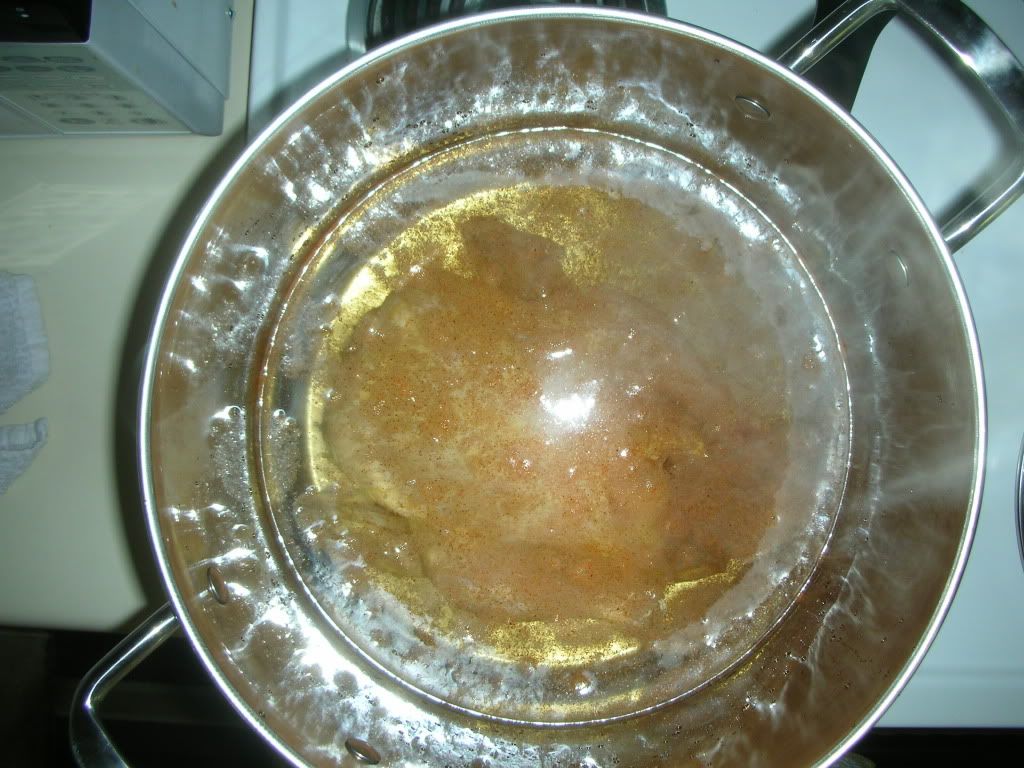
Day two is when it really gets fun. You start by making a roux. I used a 1/2 cup of vegetable oil and a little over a 1/2 cup of flour. Put the oil in a large pot (I used my dutch oven) and heat on high until shimmering. Then quickly reduce the heat to low and add the flour, whisk. Make sure to not let the flour burn. Whisk continuously for about 30 minutes, or until the roux is as dark as you want it (but not darker than a mohagony color). Season the roux while stirring. I used more Tony Chachere's and a little bit of salt. I almost thought I had messed the roux up. I gave it a taste, expecting it to... well, taste good. Let me tell y'all, it does not. It tastes like crap. Flour crap. But I kept at it and I must have done something right cause the gumbo turned out absolutely divine!
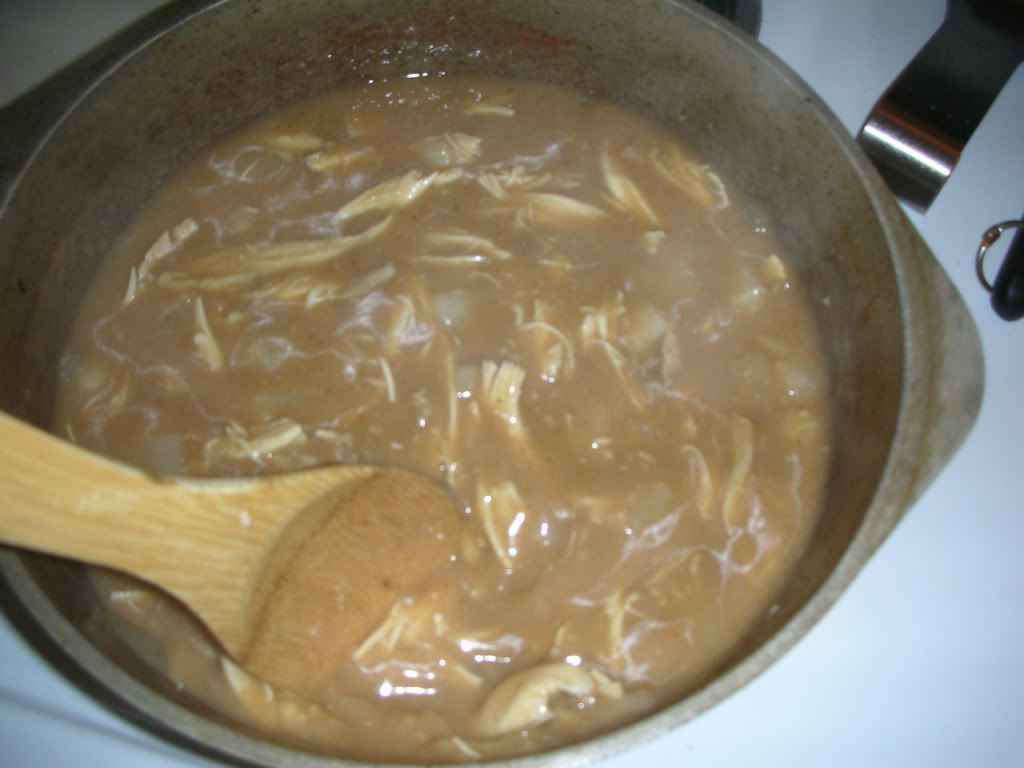
Chicken and onions!
Then add the liquid from the the day before. You will have to scrape off the layer of solids from the top first. Keep your whisk handy for this, the cold liquid coming in contact with the roux will immediately cause it to start bubbling. Add as much liquid as you like, I added about 10 cups. Keep any liquid that's left, as you might want to add more later. Let this boil, then lower the heat again and let it simmer for 30 minutes.

Add 1 to 2 onions, chopped, to the liquid. Let this cook for another 30 minutes. Season with your choice of seasoning. Now add the chicken. I added all of the chicken, and it really filled up the pot. You could use less if you would like, but I like lots of chicken. I also added an extra cup and a half of liquid here, as it was becoming quite thick. Let this cook for another 30 minutes.

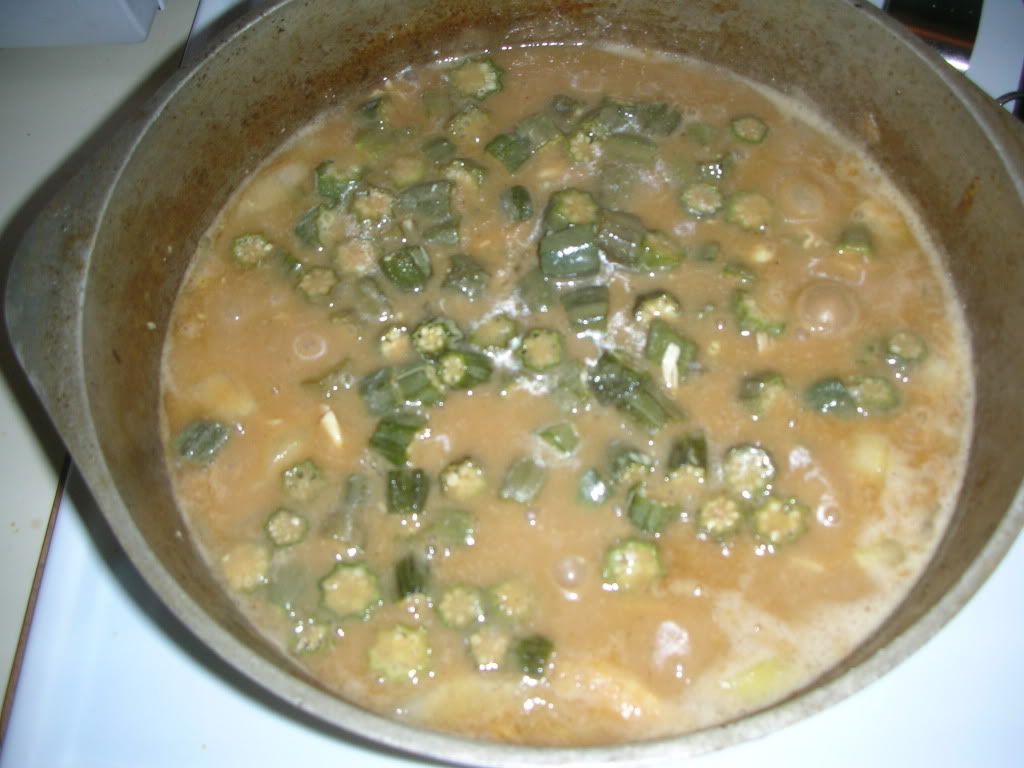
And the okra joins the party!
Once the time is up from the last step add your okra. You could use a bag of frozen okra or fresh okra if you have it. Let this cook for another 30 minutes. Depending on what type of rice you are going to use you will probably want to start cooking it when you put the okra in the gumbo, or even sooner if it takes longer than 30 minutes. Once everything is done taste and adjust the seasoning as you prefer.

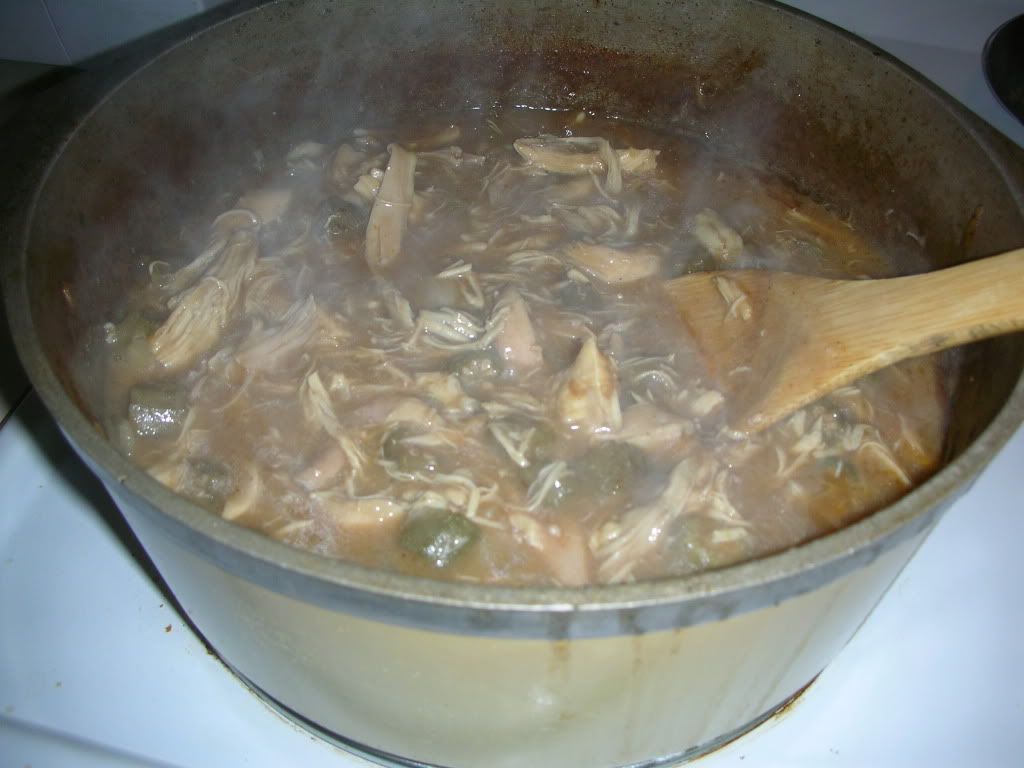
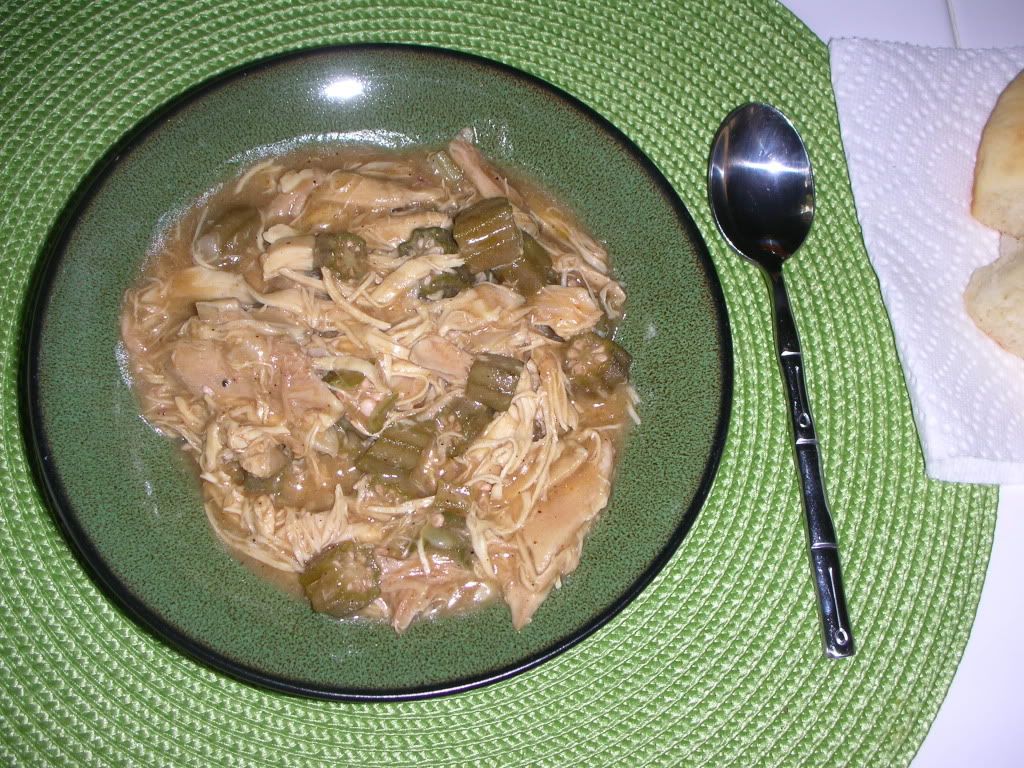
Steaming hot and ready to eat!
Pour the finished gumbo over the rice and enjoy! Even though the rice provides a carb for the meal I also really like rolls or biscuits with gumbo as well. An added bonus is that gumbo freezes excellently! So I popped a couple of servings into tupperware and into the freezer for the next couple of weeks.

I loved this challenge because it finally got me motivated to learn to make a great family favorite! I was also super proud of how it turned out. Completely delicious! I probably won't make this much in the next few months since Georgia will be hot as balls (that's a technical term) but as soon as fall and winter weather come back this will be on the menu much more often.

XO

May 17, 2011

.squash-licious.

Alright, for my first recipe since I've been back I wanted to share something really tasty with y'all. I wanted it to be something that I would be able to eat for leftovers as well, and I'm trying to get in tons of fruits and veggies this week. I might have over-indulged a little when I was home in Texas. Either that or la bebe moved a TV into my womb, and not the lightweight flat screen kind, if you get my drift. So, tonight for dinner I made a really tasty squash recipe that my father made while I was staying with them. He doesn't cook much, but when he does it's usually pretty good. I think it might help that it's home grown squash! Yum!

My parents live out in the country. The sticks, the boonies, BFE, if you want to get inappropriate about it, and my father has a decent sized garden that provides them with a large amount and variety of fresh, organic fruits and veggies. Who needs a farmer's market?! They also have chickens that lay eggs, I'm a bit jealous, but we won't get into that.

Butternut?
My father kindly sent me home with a bag of various squash. I'm pretty sure you can use any type of squash for this recipe, but I used (what I think) was a butternut squash. Perhaps the father can chime in with a comment about the type, after seeing a picture. I also changed the recipe up a little, using plain breadcrumbs instead of panko, and using butter spray instead of regular butter. I also did something a little crazy and out there, I used goat cheese instead of parmesan. Okay, I guess if you know my obsessive love of goat cheese that's really not too unimaginable and crazy, coming from me. My Grammy also said that she usually uses cornmeal, so you could also go by that variation.


Papa's Squash Recipe makes 2 servings
1 small to medium butternut squash
1 egg
small amount of flour
1 cup of breadcrumbs
Cheese of choice, for sprinkling
salt for taste

Preheat the oven to 400 degrees. Spray a baking sheet with butter flavored cooking spray.

First I arranged my 3 bowls for the breading. One bowl with the egg, whisked, one bowl with the flour, and one bowl with the breadcrumbs. You could use whatever type of seasoning you want in the crumbs, I went simply with salt.


Wash and peel the squash. Cut into rounds. One at a time (or really however you want to do it) dip a round into the flour, dust off all excess, then dip into the egg, then dip into the bread crumbs, completely covering. Place all the rounds on the baking sheet and bake for 15 minutes. Take out of the oven, sprinkle your cheese of choice onto the tops of the squash rounds, then place back in the oven for another 15 minutes.

Before going into the oven!
Halfway done, getting their cheese!
When these come out of the oven they will be crispy on the outside, tender and sweet on the inside, and the goat cheese I used provided a delicious tanginess. I paired this with some mushroom ravioli with garlic salt and fresh cracked black pepper. It also is great with pork chops or chicken. I texted the man and told him I was sad he wasn't here to enjoy it, as it was probably the best thing I've cooked in a long time! 


XO